Swift Dispatch - Trailer Compliance that allows you to upload trailer certifications and have it apply to all ONEOK terminals you load at, without bringing in the paper copies.
To create a trailer in SWIFT DISPATCH, follow these steps:
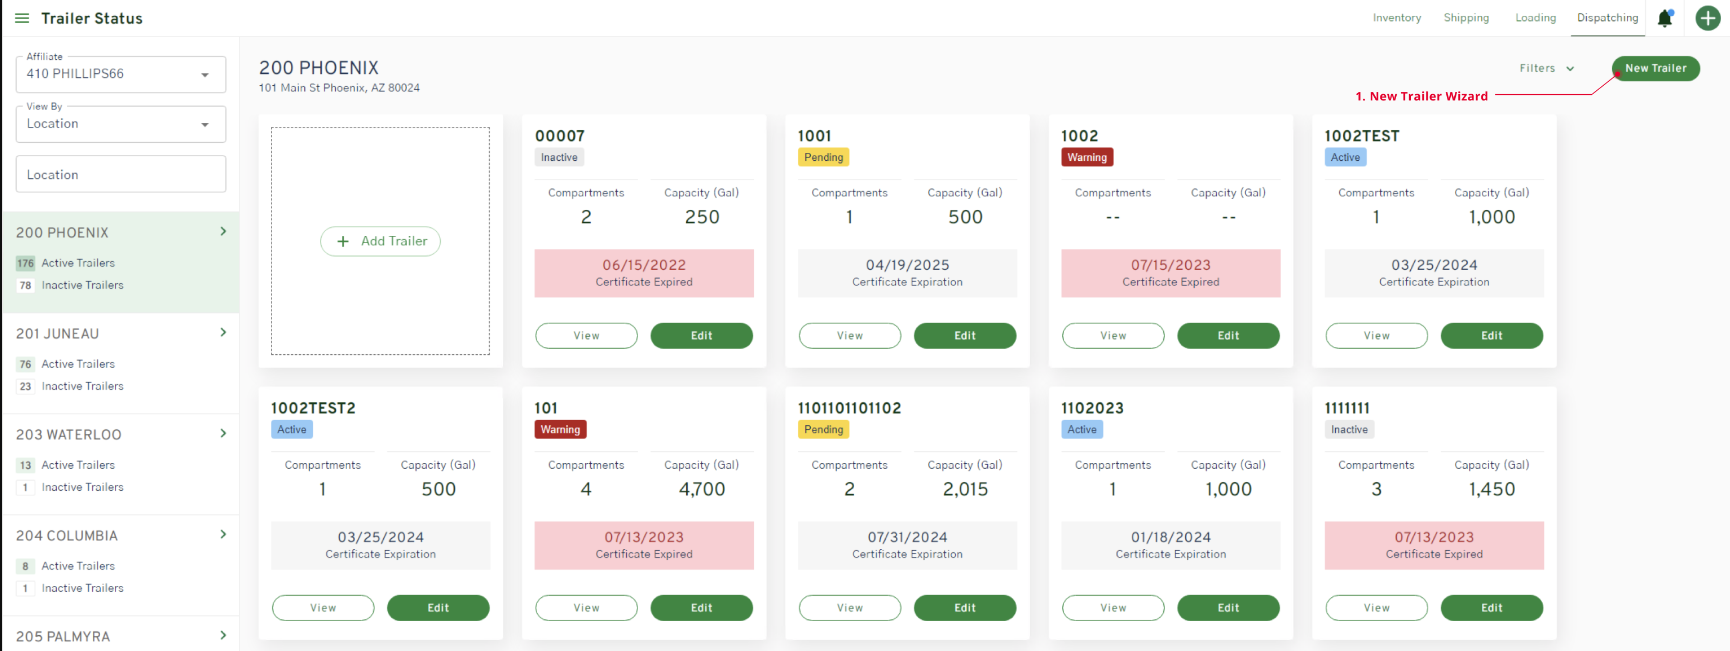
 Navigate to Trailer Compliance within the DISPATCH module.
-
Click on the NEW TRAILER button.
STEP 1
 The create trailer side wizard will open in step 1 of step 5.
 -
Enter the Trailer ID (Also known as the Vapor tightness code of the trailer)
-
If the trailer is crossing Mexico’s border and the customs agent will require the customs ID, then toggle the MX customs to active. The MX customs input field will be displayed.
-
-
After the Trailer ID is entered the user should be able to click on the CONTINUE button to proceed to step 2.
STEP 2

-
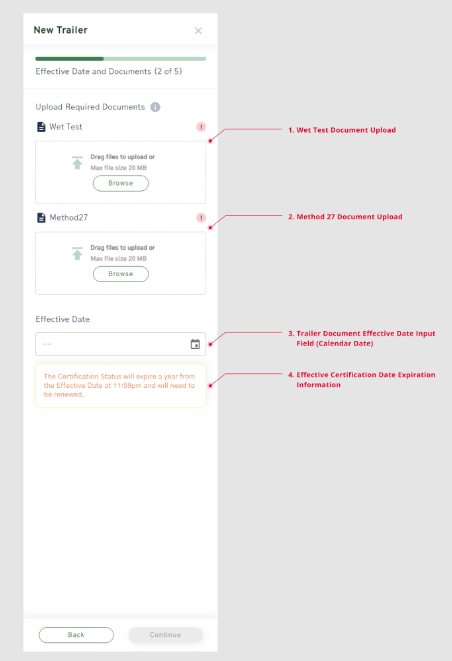
In step 2, the compliance documents can be dragged and dropped into the corresponding Method 27 or Wet Test fields.
-
Conversely, clicking on BROWSE will open the local directory and allow the user to select the desired document file.
-
Files should NOT EXCEED the 20 MB size limit.
-
-
If needed, the user can activate the tooltip located to the right of the “Upload Required Documents” text field, which will display the links to the emptied templates for the Method 27 and Wet Test documents. By clicking on the underlined links, the template documents will be downloaded to the user's local folder.
-
-
The effective date of the compliance documents (not the current date) should be selected.
-
The effective date will expire after 365 days.
-
-
After the compliance documents have been uploaded and an effective date selected, the user should click on CONTINUE to proceed to step 3.
STEP 3
-
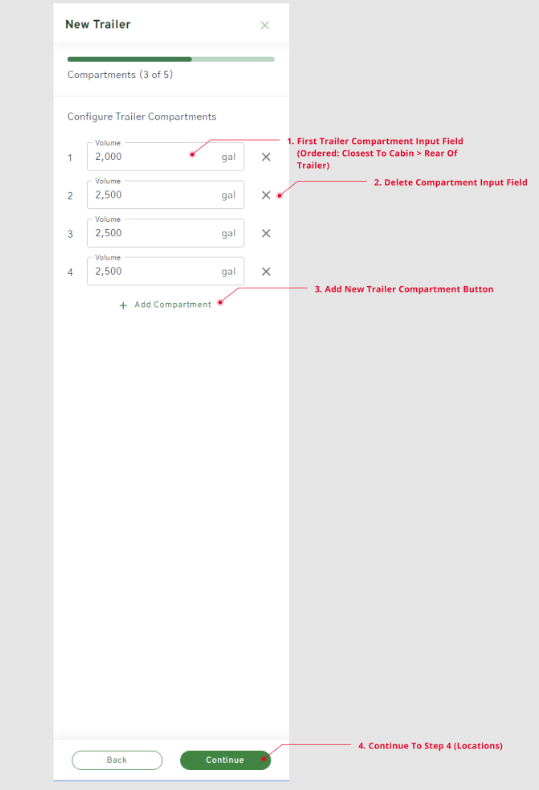
In step 3, the user enters the compartment capacity information (in gallons) starting with the trailer compartment that is closest to the driver's cabin and working backward to the tail of the trailer.
-
The user can click on the ADD COMPARTMENT button to add additional trailer compartments.
-
-
If the trailer compartment was added erroneously, then the user can click on the X icon to remove the trailer compartment.
-
After all compartments have been entered, then the user can click on CONTINUE to proceed to step 4.
STEP 4

-
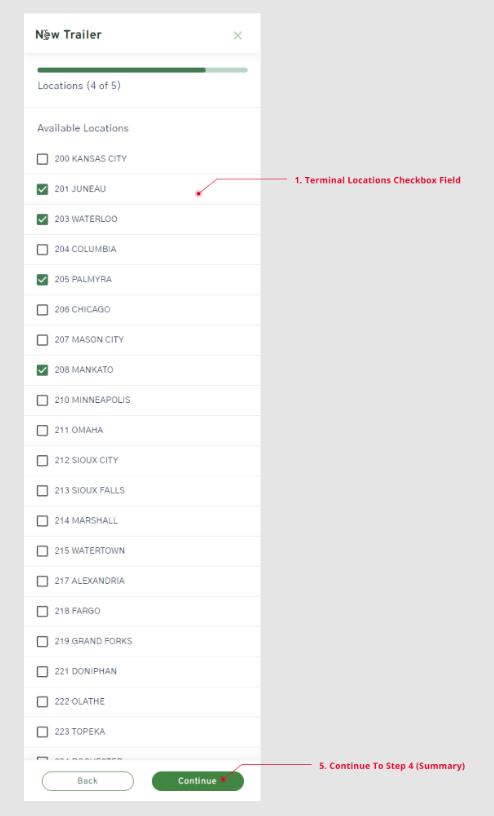
In step 4, the user can add the terminal locations to which the trailer will be dispatched.
-
After all the desired terminal locations are checked in the checklist, then the user can click on the CONTINUE button to proceed to step 5.
STEP 5

-
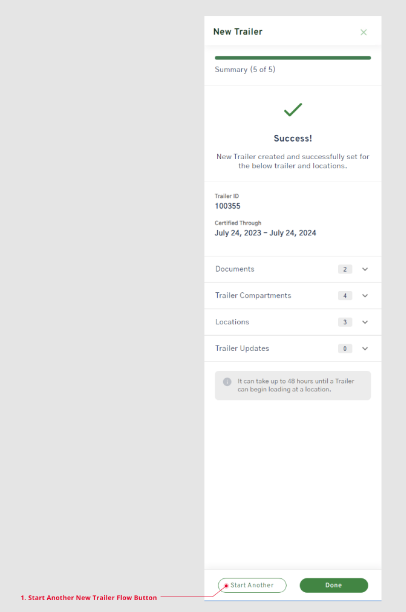
In step 5, the trailer is submitted to the desired terminal location(s), where the compliance information, compartment information, and trailer data will be stored in the local TAS system.
-
The user can click on DONE to close the Create Trailer wizard.
-
Conversely, the user can click on START ANOTHER to begin creating another trailer in the SWIFT DISPATCH system.
-